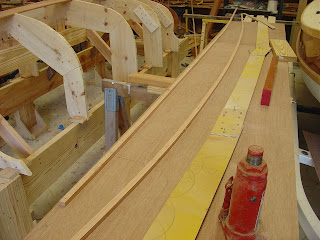
Before planking, I had to check on the outer stem with new bevels. Haven't decided yet exactly what to do with the transition from bevel to square stemhead.
My first spiling pattern was a little too flimsy. It worked, but I made a better one later.
I'm trying to use every technique that John suggests, including the layout of the planks with battens. Well, I've done that before, but had never used a router with flush-trim bit to cut a perfect curve into two planks at once before (after cutting close to the batten with a circular saw). This produces really nice results.
My first try tacking it on.
Now both of them.
Cut the gains now, before gluing.
I have over-beveled a couple of areas of the keelson, so I really piled on the epoxy to fill the gaps.
Garboard is glued on.
I rigged up some crazy clamps to pull the garboard into the transom, but found that the enormous amount of stress that it puts on the building jig and transom is not good. John's suggestion to use screws about 1 inch apart works much better. However, if you don't carefully follow his additional advice about screw placement and orientation, depth of countersink, and carefully spreading the load out over several screws as you bend the plank, there will be trouble. I had some trouble and finished with this.
I can't bring myself to post the picture of the swiss cheese that I made of the plank where the clamping screws go in. I think it will all be ok when cleaned up.
On to the second plank. My new spiling pattern is a little more robust, and this plank came out pretty much right on.
I can't help but start to plane the bottom for the keel. Once I started, I noticed that it is awkward, and would be much easier to do if you wait until the boat is planked up and then climb on top of it. In any case, it is done now.
Just letting the 1/2" oak keel get an idea of where it will be for the next few years.


No comments:
Post a Comment